

Melvin
Author at - allareportable.comMelvin is an expert for portable products.The site is for sharing everything about portable products for online buyers.
To put in a kitchen backsplash, measure the area, prepare the surface, apply adhesive, and install the tiles. A kitchen backsplash not only adds a touch of style to your space but also serves the practical purpose of protecting your walls from splatters and spills.
Whether you are a seasoned DIY enthusiast or a novice, installing a kitchen backsplash can be a relatively simple and rewarding project. By following a few steps, you can achieve a professional-looking result without breaking the bank or spending too much time.
This article will guide you through the process of putting in a kitchen backsplash, from measuring the area to applying adhesive and installing the tiles. So, let’s dive in and get started on transforming your kitchen into a beautiful and functional space.
Choosing The Right Kitchen Backsplash Design
Choosing the right kitchen backsplash design is essential to create a cohesive and visually appealing space. Consider your kitchen style and personal preferences when selecting a design.
Take into account the existing color scheme and materials in your kitchen, ensuring that the backsplash complements them. Research popular backsplash designs and trends to get inspiration and ideas. Bold patterns or vibrant colors can add a statement to a neutral kitchen, while a simple and subtle design can enhance a busy kitchen.
It is important to find a balance between visual impact and functionality. Remember to consider the ease of cleaning and maintenance as well. By following these guidelines, you can confidently put in a kitchen backsplash that will enhance the overall look and feel of your space.
Gathering The Necessary Materials And Tools
Gathering the necessary materials and tools is the first step when putting in a kitchen backsplash. Accurately measure the dimensions of your kitchen backsplash area to ensure you purchase the appropriate amount of backsplash tiles or materials.
This will help to prevent any wastage or shortage during the installation process. Make sure to get all the necessary tools for the job, including a tile saw, adhesive, grout float, and any other specific tools required for your chosen backsplash materials.
Having all the materials and tools ready beforehand will save you time and make the installation process smoother. So, before starting the installation, take the time to gather all the necessary items and double-check your measurements to ensure a successful kitchen backsplash project.
Preparing The Kitchen Backsplash Area
Clear the area and remove any existing tiles or wallpaper. Clean the wall surface thoroughly to ensure proper adhesion. Repair any imperfections or holes in the wall.
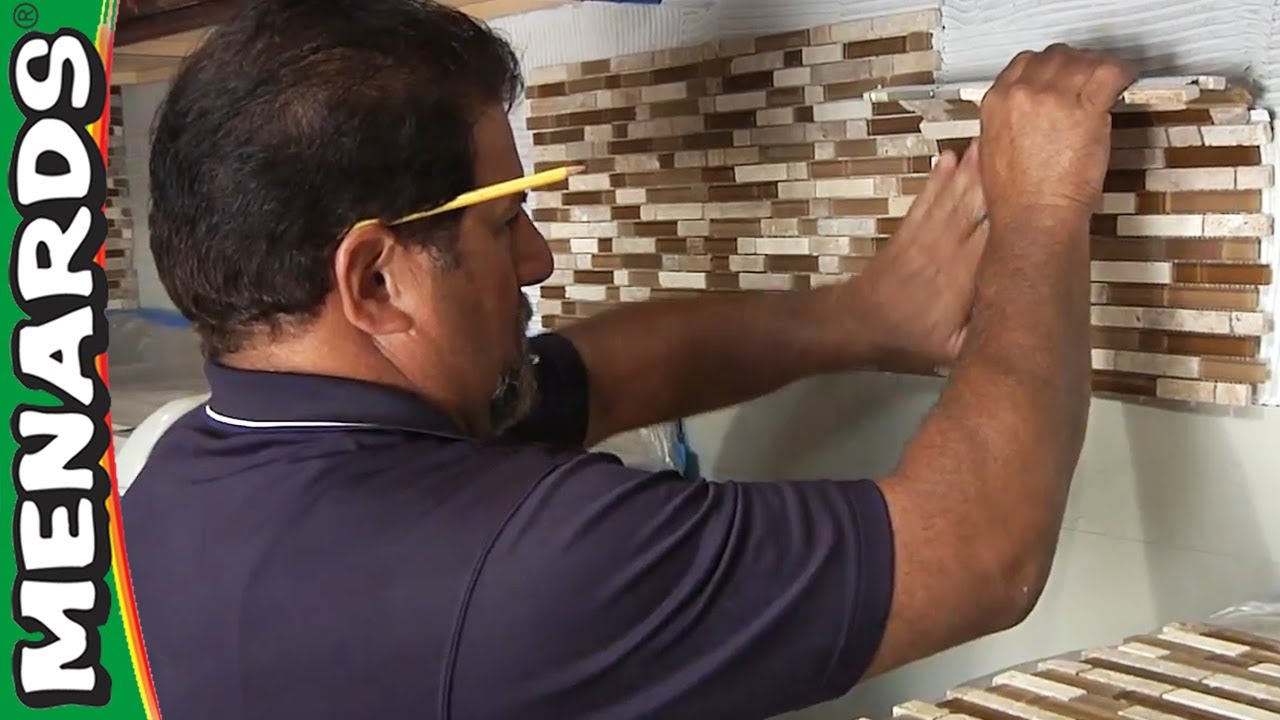
Installing The Kitchen Backsplash Tiles
Installing a kitchen backsplash is a great way to enhance the look of your kitchen. Before starting the installation, lay out the tiles in your desired pattern to get an idea of how they will look. This will help you make any adjustments before applying the adhesive.
Next, apply the tile adhesive evenly on the wall using a trowel or a recommended method. Ensure that the adhesive is spread uniformly to create a strong bond between the tiles and the wall.
Carefully press each tile onto the adhesive, making sure they are level and aligned. Take your time to ensure that the tiles are placed correctly, as this will affect the overall appearance of the backsplash.
Using tile spacers can help maintain uniform spacing between the tiles. These spacers will ensure that there is a consistent gap between each tile, creating a professional finish.
Once all the tiles are in place, allow the adhesive to dry as per the manufacturer’s instructions. After the adhesive has cured, you can remove the spacers and apply grout to fill in the gaps between the tiles.
With the proper installation techniques and attention to detail, you can successfully put in a kitchen backsplash that adds beauty and functionality to your kitchen.
Grouting And Sealing The Kitchen Backsplash
To grout and seal your kitchen backsplash, you need to follow a few steps. First, wait for the adhesive used to stick the tiles to dry completely before removing the tile spacers. Next, prepare the grout mixture according to the instructions provided by the manufacturer.
Once the grout is ready, use a grout float to apply it, making sure to fill in all the gaps between the tiles. Apply enough pressure to ensure the grout is properly distributed. After this, take a damp sponge and wipe off any excess grout from the surface of the tiles.
Allow the grout to dry for the recommended time specified by the manufacturer. This will typically take a few hours or overnight. Once the grout is fully dried, complete the process by applying a grout sealer. The sealer will protect the grout from staining, mold, and mildew, and will make it easier to clean in the future. Follow the manufacturer’s instructions for applying the sealer.
Cleaning And Maintaining The Kitchen Backsplash
Cleaning and maintaining your kitchen backsplash is essential to keep it looking clean and fresh. Regularly clean the backsplash using appropriate cleaning products to remove dirt and grime. Avoid using abrasive materials or harsh chemicals that can damage the tiles and affect their appearance.
Inspect the grout periodically to ensure its condition and reapply sealer as needed to prevent moisture and dirt from penetrating. addressing these issues promptly can prevent further damage and deterioration.
Remember to address any issues such as loose tiles or cracked grout promptly to avoid further problems and maintain the overall integrity of your kitchen backsplash. Keeping your kitchen backsplash clean and well-maintained will not only enhance its visual appeal, but also extend its lifespan.
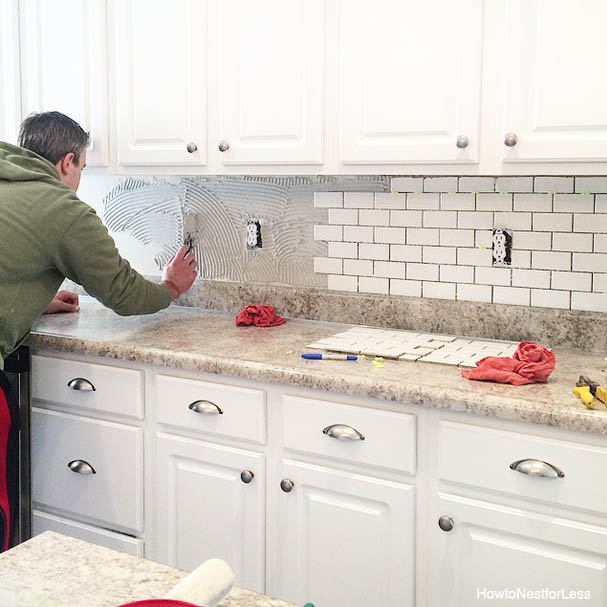
Credit: howtonestforless.com
Frequently Asked Questions For How To Put In A Kitchen Backsplash
How Do You Choose A Kitchen Backsplash?
Choose a kitchen backsplash that matches your overall kitchen style and color scheme. Consider factors such as durability, ease of maintenance, and cost. Tiles, glass, or natural stone are popular choices. Don’t be afraid to mix and match materials to create a unique look.
What Tools Do You Need To Install A Kitchen Backsplash?
To install a kitchen backsplash, you’ll need tools such as a tape measure, trowel, notched trowel, tile spacers, tile cutter, wet saw, grout float, and a sponge. Make sure to wear safety goggles and gloves for protection.
How Do You Prepare The Wall For A Kitchen Backsplash?
Start by cleaning the wall with a degreasing cleaner to remove any grease, dirt, or debris. Fill in any holes or cracks using a patching compound. Sand the wall surface to create a smooth base. Finally, apply a coat of primer to ensure proper adhesion of the backsplash tiles.
Final Words
To sum it up, installing a kitchen backsplash may seem daunting, but with these step-by-step instructions, you can successfully complete the project. Remember to plan your design, gather the necessary tools and materials, prepare the surface, apply the adhesive and grout, and finish with proper sealing.
By following these guidelines, you’ll be able to enhance the beauty and functionality of your kitchen while adding a personal touch. So, go ahead and embrace the DIY spirit, and transform your kitchen with a stunning backsplash. Happy designing!
Melvin is an expert for portable products.The site is for sharing everything about portable products for online buyers.