

Melvin
Author at - allareportable.comMelvin is an expert for portable products.The site is for sharing everything about portable products for online buyers.
To install a Moen kitchen faucet, follow these simple steps. Begin by shutting off the water supply and removing the old faucet.
Next, insert the new faucet into the sink and secure it in place. Finally, connect the supply lines and turn the water back on. Now you can enjoy your new Moen kitchen faucet with ease and convenience. Your kitchen faucet plays a vital role in your daily activities, from washing dishes to preparing food.
If your old faucet is leaking or worn-out, it may be time for an upgrade. Installing a Moen kitchen faucet is a straightforward process that you can easily do yourself. We will guide you through the step-by-step instructions to install your faucet without any hassle. So, let’s get started and transform your kitchen with a brand new Moen faucet.
Tools And Materials Needed
| List of tools required | List of materials required |
|---|---|
|
|
Installing a kitchen faucet is a straightforward process that can be completed with the right tools and materials. To begin, you will need an adjustable wrench and basin wrench to remove the old faucet and install the new one. Additionally, have plumber’s tape and plumber’s putty on hand to ensure a leak-free installation.
Before beginning the installation, gather your materials, including a bucket and cloth to catch any water that may spill during the process. The main materials you will need are the kitchen faucet, supply lines, plumbing tape, plumber’s putty, and silicone caulk for sealing the faucet to the sink.
By following these steps and using the appropriate tools and materials, you will be able to successfully install a Moen kitchen faucet in your home.
Shutting Off The Water Supply
To install a Moen kitchen faucet, it is important to shut off the water supply. This can be done by turning off the water valves. The water valves are usually located beneath the sink. By turning these valves clockwise, you can effectively shut off the water supply to the faucet.
After shutting off the water supply, it is also essential to relieve the water pressure. This can be done by turning on the faucet and letting the remaining water flow out. This step ensures that there is no excessive pressure in the plumbing system, making the installation process safer and easier.
Following these steps will help you prepare for the installation of your new Moen kitchen faucet. Remember to shut off the water valves and relieve the water pressure before proceeding with the installation.
Disconnecting The Water Supply Lines
Disconnecting the water supply lines:
To begin the process of installing a Moen kitchen faucet, the first step is to disconnect the water supply lines. This is an important step to ensure that no water is flowing while you are working on the faucet.
Removing the old supply lines:
Before you can install the new faucet, you need to remove the old supply lines. Start by turning off the water supply valves under the sink. Use an adjustable wrench to loosen the nuts connecting the supply lines to the faucet. Once the nuts are loose, you can easily remove the old supply lines.
Draining any remaining water:
After the old supply lines are removed, there may still be water left in the pipes. To prevent any spills or leaks, it is essential to drain any remaining water. Simply place a bucket or towel under the pipes and open the faucet handles to allow the water to drain out completely.
Removing The Old Faucet
To remove the old kitchen faucet, start by loosening the mounting nuts located beneath the sink. Use a wrench to counterhold the nuts, while using another wrench to turn the mounting bolts counterclockwise.
Once the nuts have been loosened, detach the faucet from the sink by lifting it up and pulling the supply lines through the mounting holes. Be careful not to damage any of the surrounding plumbing connections during this process.
If the faucet is stuck, applying penetrating oil can help loosen it. Once the old faucet is completely removed, clean the sink surface thoroughly to prepare for the installation of the new faucet. Removing the old faucet is an important first step to ensure the successful installation of your new kitchen faucet.
Inspecting The New Faucet
Inspecting the new faucet is an important step when installing a kitchen faucet by Moen. This ensures that all components and parts are in proper working condition before proceeding with the installation process.
Start by checking the faucet body, handle, and spout for any visible damage or defects. Look for any leaks or signs of wear and tear. It is also crucial to verify the compatibility of the faucet with the sink setup.
Check the number of holes in the sink and compare it with the number of holes required for the faucet installation. This will help ensure a seamless fit and prevent any complications during the installation. By thoroughly inspecting the new faucet, you can address any issues beforehand and ensure a successful installation process.

Credit: diy.stackexchange.com
Preparing The Sink Area
Preparing the sink area is an essential step before installing a kitchen faucet Moen. Start by cleaning the sink surface thoroughly to ensure a clean and smooth installation. Use a mild detergent and warm water to remove any dirt or grime. Rinse the sink well and dry it with a clean cloth.
Once the sink is clean, you need to ensure proper alignment of the mounting holes. Check the manufacturer’s instructions for the specific measurements and dimensions required for your faucet. Use a tape measure or ruler to mark the position of the mounting holes on the sink.
Attaching The New Faucet
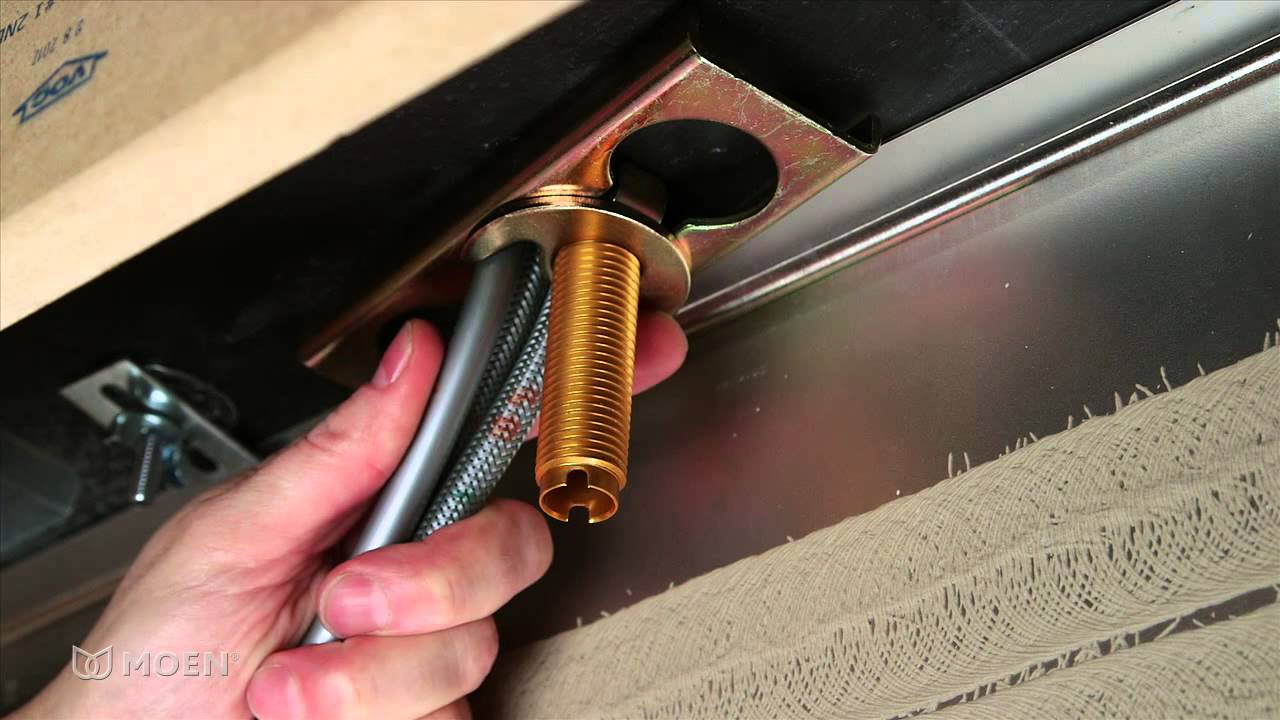
When installing a new kitchen faucet, it is important to properly attach and secure it. The first step is to place the gasket on the sink. This gasket creates a watertight seal between the faucet and the sink, preventing any leaks. Make sure to position it correctly, ensuring it aligns with the holes on the sink.
Once the gasket is in place, you can attach the new faucet. Start by inserting the faucet through the mounting holes on the sink. Then, tighten the mounting nuts from below, securing it firmly in place. You can use a wrench or pliers to ensure a tight fit. Be careful not to overtighten, as it could damage the faucet or the sink.
After attaching the faucet, it is important to check for any leaks. Turn on the water supply and inspect for any water leakage around the base of the faucet or under the sink. If there are any leaks, tighten the mounting nuts further or reposition the gasket. Once you are confident that everything is secure, you can enjoy your new kitchen faucet!
Connecting The Water Supply Lines
Connecting the water supply lines
To attach the supply lines to the Moen kitchen faucet, follow these steps:
- Tighten the compression nut over each supply line onto the faucet’s valve.
- Ensure the rubber gasket is in place between the nut and the valve for a tight seal.
- Use a wrench to securely tighten the compression nut.
- Turn on the water supply valves slowly to check for any leaks.
It is important to ensure a secure connection between the supply lines and the faucet to prevent any water leakage. By following these steps, you can ensure a proper installation of your Moen kitchen faucet.
Testing For Leaks
Testing for leaks is an essential step after installing a Moen kitchen faucet. To ensure the installation is successful and prevent any water damage, it is important to turn on the water supply gradually.
After securely attaching the faucet and tightening the connections, slowly turn on the water supply valves. Keep a close eye on the connections and the faucet itself for any signs of leaking.
If you notice any water leakage, immediately turn off the water supply valves and inspect the connections. Check if the connections are tight and if there are any loose or damaged parts. It is recommended to use a cloth or towel to dry the areas around the connections before inspecting.
Once you have resolved any leaks, carefully turn on the water supply again, gradually increasing the water flow. Observe the faucet and connections for any additional signs of leakage. If everything is dry and secure, you have successfully installed your Moen kitchen faucet without any leaks.
Installing A Soap Dispenser Or Additional Features
To install a soap dispenser in addition to your kitchen faucet, follow these steps:
- Locate the soap dispenser hole on the sink. It is usually located next to the faucet.
- Remove the protective covering from the soap dispenser.
- Insert the soap dispenser into the hole, making sure it fits snugly.
- Underneath the sink, connect the soap dispenser tube to the soap dispenser pump.
- Connect the other end of the tube to the soap dispenser bottle or container.
- Turn on the water supply to test the soap dispenser. Pump the dispenser a few times to ensure proper flow.
- Optional: If you want to add other features, such as a filtered water dispenser or a hot water dispenser, follow the manufacturer’s instructions for installation.
Troubleshooting Common Issues
Identifying and resolving leaks:
Leakage is a common problem encountered during kitchen faucet installation. To identify the source of the leak, carefully inspect all connections. If you notice any loose nuts or damaged washers, tighten or replace them accordingly.
Another potential cause of leaks is improper threading of pipes. Take care to ensure that all connections are tightly threaded. If the leak persists, consider using the plumber’s tape to create a more secure seal.
Handling other common installation problems:
In addition to leaks, there might be other common issues during kitchen faucet installation. These can include difficulty in removing the old faucet, improper size of the new faucet, or problems with water flow.
To address these, check the faucet’s compatibility with your sink and ensure that the water supply is turned off before removing the old faucet.
Choose the new faucet carefully, matching its size and specifications. If you experience low water flow, check for any debris blocking the aerator. Cleaning or replacing the aerator can help restore normal water flow.
Finalizing The Installation
After successfully connecting the water supply lines, it is essential to secure all connections to ensure a leak-free installation. Start by tightening the nuts on the faucet connections using a wrench, making sure they are snug but not over-tightened.
Similarly, secure the supply lines to the shut-off valves, ensuring there are no loose or wobbly connections that could lead to leaks.
Once all the connections are secure, it is crucial to clean up the workspace. Wipe away any excess debris or water using a clean cloth or paper towel. This will help prevent any potential damage or staining to your cabinets or countertop.
Additionally, double-check the faucet for any visible scratches or marks. If necessary, use a gentle cleaner or polish to restore its shine and appearance.
Completing the installation of your Moen kitchen faucet requires attention to detail in securing connections and maintaining a clean workspace. By following these steps, you can ensure a successful and functional installation that will provide you with years of reliable use.
Frequently Asked Questions On How To Install Kitchen Faucet Moen
How Do I Install A Kitchen Faucet Moen?
To install a Kitchen Faucet Moen, start by shutting off the water supply and removing the old faucet. Then, attach the new faucet using the provided hardware and tighten all the connections. Finally, turn on the water supply and test for any leaks.
Conclusion
Installing a Moen kitchen faucet can be a simple process with the right steps and tools. By following the instructions outlined in this blog post, you can successfully replace your old faucet and upgrade to a new Moen model, enhancing the functionality and design of your kitchen.
Remember to follow safety precautions and to consult the manufacturer’s guidelines for specific product details. Enjoy the benefits of a new and improved kitchen faucet with Moen!
Melvin is an expert for portable products.The site is for sharing everything about portable products for online buyers.